We want to make the robot chassis move forward, backward, and turn left and right.
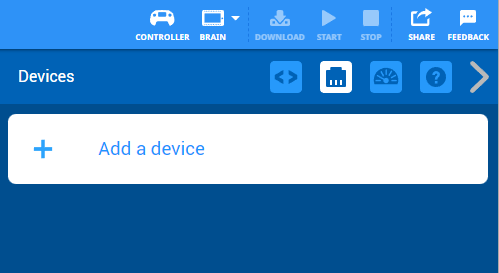
The first thing we need to do is tell VEXcode V5 that we have motors we need to control. Click on the CONFIGURE DEVICES button.
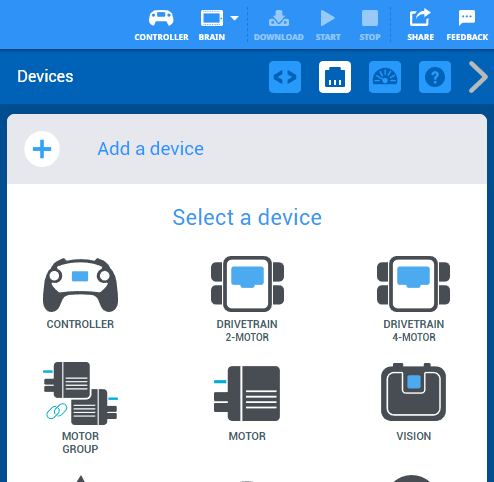
Then choose “ADD A DEVICE“. We could set up each motor separately and tell them when to turn on and turn off, but VEX code has a more powerful feature called a drivetrain. Let’s choose a DRIVETRAIN 2-MOTOR device.
Tell it which ports your LEFT and RIGHT motors are connected to. We currently have no sensors attached, so say “NO GYRO“
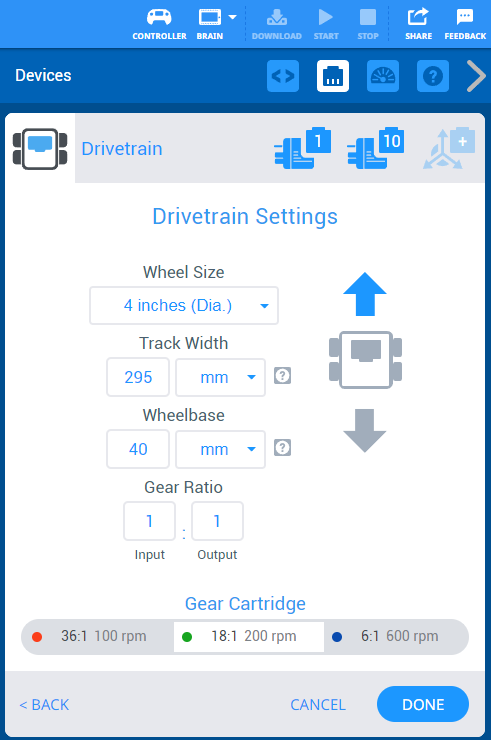
Without a gyro sensor, you have to describe you robot design to VEXcode in order for it to know how to make accurate turns.
WHEELS:
The standard V5 builds use 4 inch diameter wheels.
TRACK WIDTH:
Track width is the distance between the robot’s right wheel’s center point and the robot’s left wheel’s center point.
The wider the track width, the more revolutions the wheels on each side need to make in opposite directions per degree of turn.
You will need to measure your robot’s track width (center of left wheel to center of right wheel).
WHEEL BASE:
Wheelbase is the distance between the drive shafts of the two drive wheels on the robot’s side.
You will need to measure your wheelbase (axle of front wheel to axle of back wheel).
The standard V5 Clawbot uses 4 inch diameter wheels. It has a track width of about 11.5 inches (center of left wheel to center of right wheel). It has a wheelbase of 6.5 inches (axle of front wheel to axle of back wheel). However, you should measure these for your robot to make sure the numbers match the way it was built.
We have no gears on our Clawbot, so leave the gear ratio at 1:1. You are probably using motors with the green insert, so do not change the GEAR CARTRIDGE.
If you find that the robot drives “backward” when you tell it to go “forward”, then change the blue arrow from pointing up to pointing down.
Be sure to click DONE when you are finished.
Challenge:
Task 1:
Program your robot to drive forward 2 feet. (Each tile in the game field is 2 feet across.)
Task 2:
Program your robot to drive forward 4 feet, then backward 3 feet.
Does it stop in the middle of a tile?
Task 3:
Program your robot to spin 90 degrees left, then 180 degrees right, then 90 degrees left.
Does it end up facing the direction it started?
Task 4:
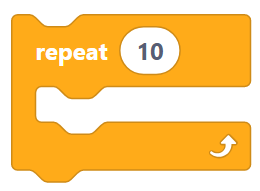
Program your robot to drive in a 3 foot square. (Since a square uses the same instructions multiple times, use a repeat loop.)
Task 5:
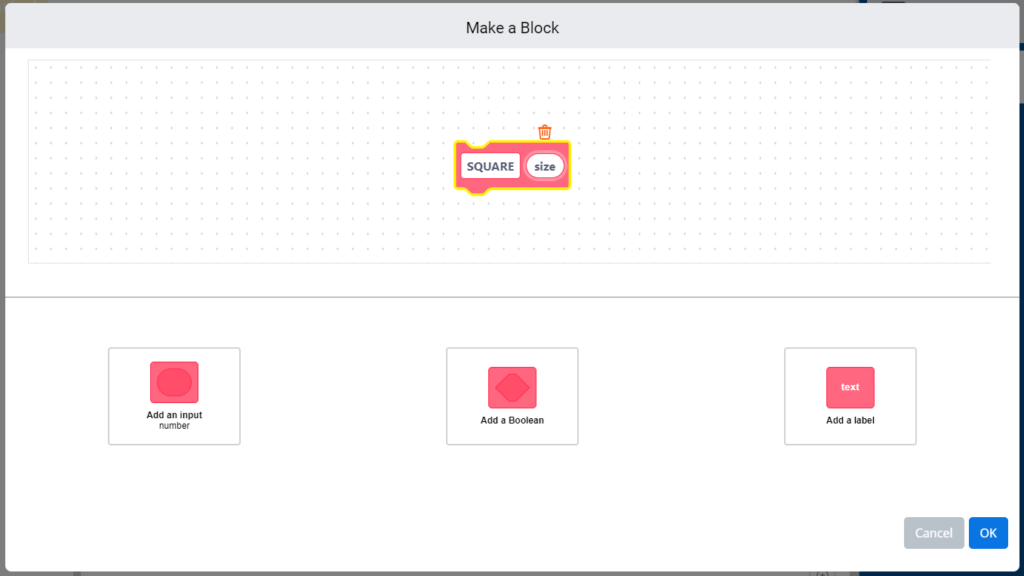
Now make a MY BLOCK (function or procedure) to control the square. In programming, a procedure or function is a defined piece of code that can be run multiple times. Anytime we want to use that code, we just ask the function to run and it does.
Make a MY BLOCK called “SQUARE“. Click “ADD AN INPUT” and change its name from “NUMBER” to “SIZE“. You will copy the code you wrote for the square in Task 4 into the DEFINE SQUARE block. Instead of telling it to drive 3 feet on each side, drag the oval that says “SIZE” into the DRIVE FORWARD FOR block. Now when you want to make a square, drag the SQUARE command from MY BLOCKS, attach it below the WHEN STARTED event, and put whatever size you want it to be in the white oval.
Write a program that makes a 2 foot square, followed by a 3 foot square, followed by a 4 foot square.